Highly Available DHCP is the backbone of network connectivity in modern infrastructures. When DHCP fails, clients lose IP leases, hindering access to services. Windows Server 2025’s built-in DHCP failover ensures two servers share lease and scope data, delivering uninterrupted IP assignment—even during maintenance or outages.
This is a continuation of the Windows Server 2025 series. Previously: Windows Server 2025 – Part 7 (Active Directory Hardening).
Table of Contents
Highly Available DHCP Overview
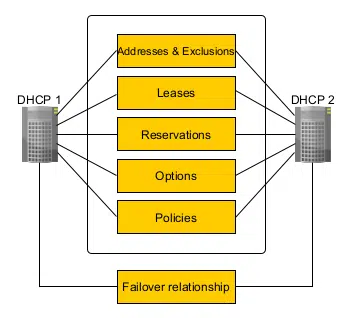
Windows Server 2025 implements the IETF failover reference model. Two DHCP servers (Primary & Partner) synchronize lease states and share configuration.
The figure below shows how components and settings for a DHCP scope that can handle failovers are shared between two DHCP servers.
Detailed Microsoft documentation:
https://learn.microsoft.com/windows-server/networking/technologies/dhcp/dhcp-failover
Failover uses a State Switchover Protocol over TCP port 647. Heartbeats confirm server health; when one fails, the partner transitions to active roles based on the Maximum Client Lead Time (MCLT) setting.
When creating a DHCP failover relationship, you can use two DHCP failover modes:
- Load Balance
Both servers serve IP leases concurrently, splitting traffic based on a configurable load balance ratio. - Hot Standby
A secondary remains idle, stepping in only when the primary becomes unreachable.
The failover modes can be switched and you can have both failover modes configured on the same DHCP server, as long as you configure multiple failover relationships.
Requirements
- Failover Relationship: Only two DHCP servers can participate in a failover relationship.
- Supported Protocol: DHCP failover supports DHCPv4 scopes only.
- Communication: Servers must maintain a persistent TCP/IP connection and be able to communicate directly or via a DHCP relay.
- Lease Synchronization: Each server maintains a separate, synchronized lease database.
- Configuration Tools: Can be configured via Server Manager or Windows PowerShell.
For the full list of requirements please check here.
Limitations
- Manual Replication: Changes to scope settings must be manually replicated to the partner server.
- Scope Duplication: You cannot configure failover if the scope already exists on both servers.
- Single Relationship per Scope: Each scope can only be part of one failover relationship.
- Replication Source: Always initiate replication from the server with the desired configuration, especially when OS versions differ.
- Failover Partner Count: A DHCP server can have multiple failover relationships, but each is strictly one-to-one.
For the full list of limitations please check here.
Datacenter Placement for Highly Available DHCP
For true resilience, host your Primary and Partner DHCP servers in separate datacenters:
- Geographic Diversity
Protects against site-wide failures (power, network, natural disasters). - Network Latency Considerations
Keep MCLT low (e.g., 30 min) to quickly failover across WAN links. - Redundant Connectivity
Ensure TCP port 647 is open in both directions with fail-safe routing. - AD Site Awareness
Align DHCP servers with Active Directory sites and subnets for optimal client affinity. - Testing Switchover
Simulate a site outage to validate partner takeover and client lease behavior.
This multi-site approach eliminates single points of failure, ensuring DHCP service even if one datacenter goes offline.
In large environments, I have used this configuration with two DHCP servers in the European Datacenter or when there was concerns around network redundancy, we went with one DHCP cluster per region (North America, Europe & Middle East, Asia, and if needed, South America, Australia, and Africa).
In regions with two colocation data centers, we have used load balanced configurations, while in regions with only one colocation, we have chosen hot standby with the colocation and the most resilient site with local infrastructure available.
Best Practice: Dedicated DHCP Hosts
Please review your configuration carefully. I have seen a lot of DHCP servers running on domain controllers and I would highly recommend to avoid that. If you can, seperate services on a 1 service per server relationship in your environment. I recommend using Hyper-V with AVMA to simplify it.
If you need more arguments, please check the following list.
- Least-Privilege Security
Dedicated DHCP servers avoid granting broad AD rights to network admins. Keep DHCP service accounts in a minimal-privilege group. - Operational Stability
Separating roles prevents service overload on DCs and simplifies patch cycles without LDAP/DNS impact. - Isolation from Domain Controllers
Installing DHCP on DCs increases attack surface. A compromised DHCP admin could misuse scope configurations or spoof IP ranges to intercept traffic
Installing DHCP Server on Windows Server 2025
You can follow the guide for your home lab here. It includes a single server design with AD, DNS and DHCP. This was often seen in environments 10 to 15 years ago. This is sufficiant for your homelab, but shouldn’t be a configuration for production. You should always seperate AD, DNS & DHCP for any organization with multiple sites and AD Site and Services configurations. This can also be fully automated using Powershell and there is a Microsoft Guide for this available here.
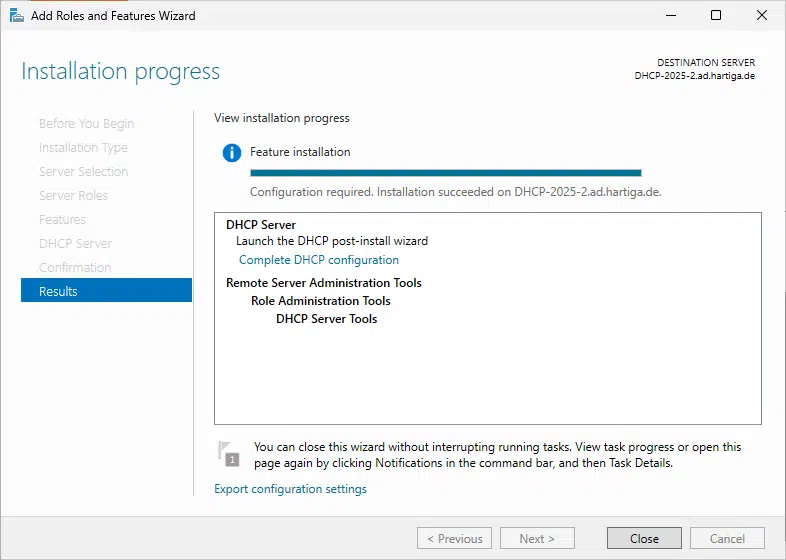
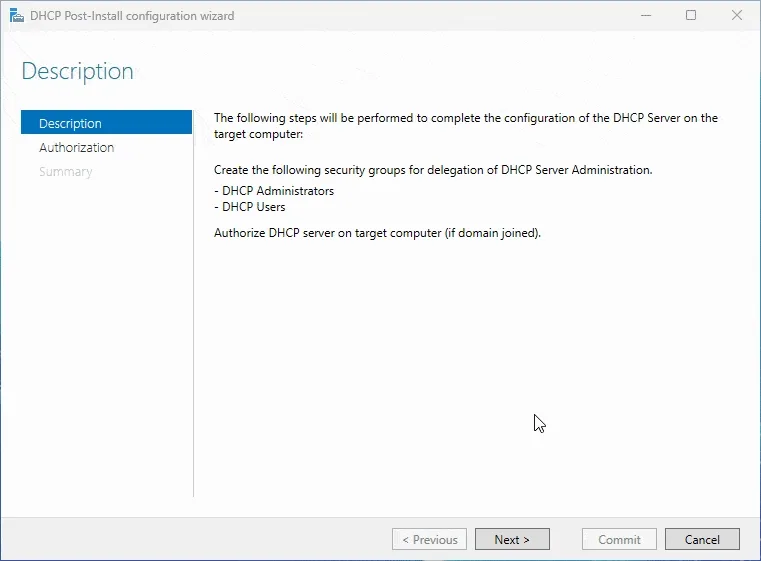
Installing DHCP Server: Step-by-Step using Server Manager
Please configure a static IP. Your DHCP communication will rely on using the same IP. I haven’t done this and will get the “well deserved” alerts in the step by step guide using an animated GIF. If these show up for you, fix that.
 2")
Installing DHCP Server: Step-by-Step using PowerShell
To install the DHCP Server role using PowerShell including the management tools, you can run the following command:
Install-WindowsFeature -Name DHCP -IncludeManagementTools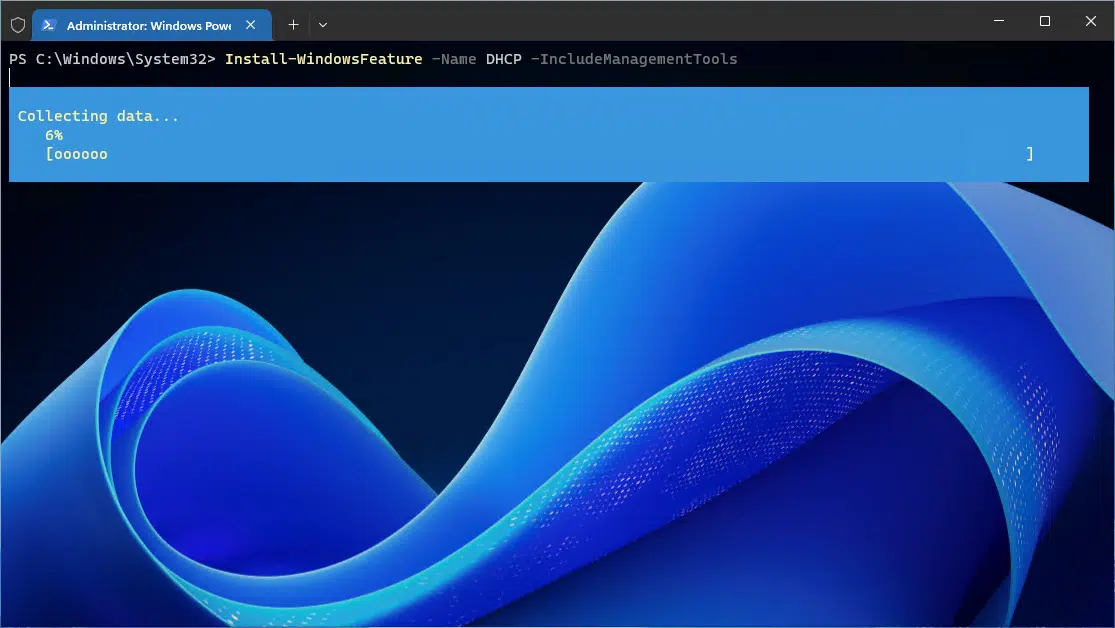
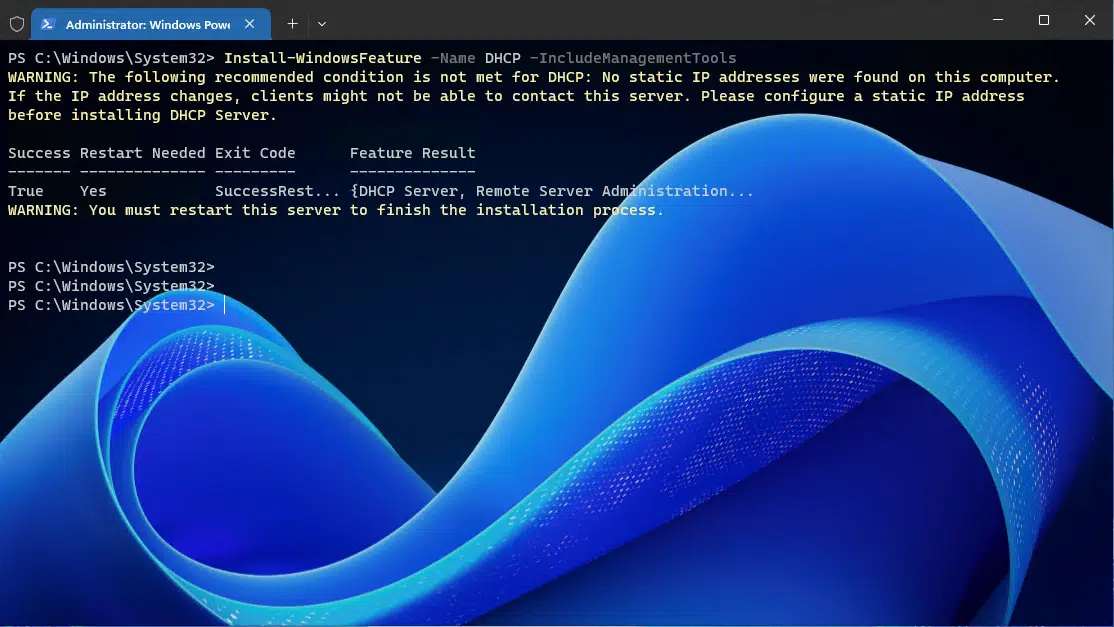
This is something where PowerShell is really a lot simpler than using the GUI. So remember that, if you rebuild your DHCP servers regularly. If you want a customized terminal like the one I am using, check my guide here.
Configuring Highly Available DHCP on Windows Server 2025
Configuring Highly Available DHCP Services needs to be done on one of your DHCP servers. Automation is useful in larger environments and for training purposes. For this blog, I will focus on the GUI-based approach, as I believe it provides the initial basic understanding needed. The Powershell information is shared as a reference.
Configuration using PowerShell
Step 1. Authorize your DHCP Server
Add-DhcpServerInDC -DnsName "YourServerName.domain.com" -IPAddress "YourDHCPServerIPAddress"Make sure you replace “YourServerName.domain.com” with the DNS name of your server and “YourDHCPServerIPAddress” with the actual IP address assigned to your DHCP server. The authorization will grant the correct permissions in the Active Directory environment.
Step 2. Create your first DHCP Scope
Add-DhcpServerV4Scope -Name "DHCP Scopte - https://hartiga.de" -StartRange 192.168.0.10 -EndRange 192.168.0.249 -SubnetMask 255.255.255.0 -State ActiveMake sure you change the Name, StartRange, EndRange, SubnetMask as needed.
If you want to learn more about DHCP and PowerShell check the Microsoft article here and the DHCP Powershell Reference.
Configuring Highly Available DHCP: Step-by-Step using DHCP MMC
Please configure a static IP. Your DHCP communication will rely on using the same IP. I haven’t done this and will get the “well deserved” alerts in the step by step guide using an animated GIF. If these show up for you, fix that.
For the initial configuration we need to authorize the DHCP server and in the 2nd step create our first DHCP Scope. The DHCP Scope will include the settings for your clients, i.e. the DNS Domain Name, the DNS Server, the subnet mask and router.
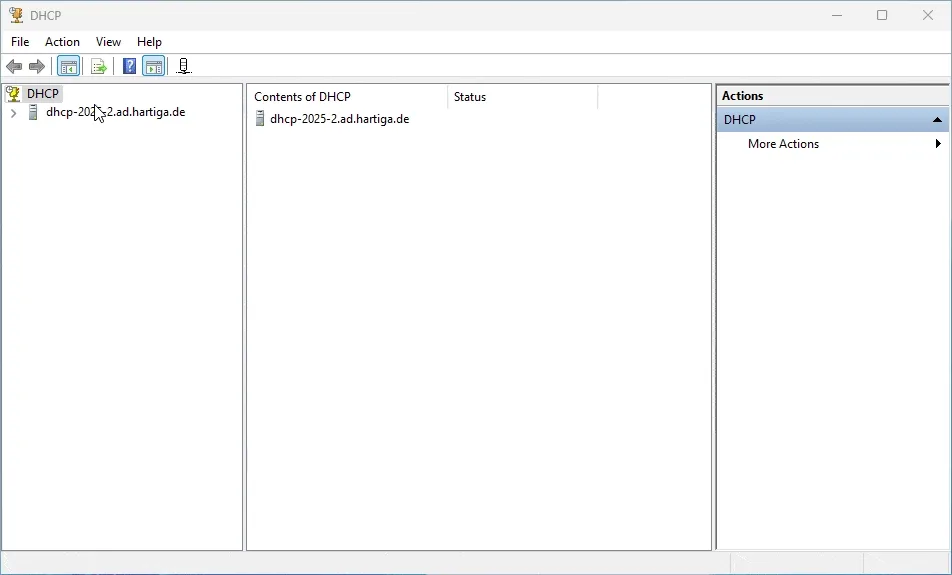
Authorize DHCP Server
This can be done using a PowerShell Command, the Server Manager or the DHCP Console. Lets activate it from the Server Manager and configure the remaining components from there.
Lets get used to the DHCP console and Authorize our DHCP Servers from there.
You can add the DHCP Plugin to any MMC Console you have opened or enter Start – Search – DHCP and you will get the option on your DHCP servers. If you want to use DHCP on your Admin Client, please make sure you install the current RSAT – Remote Server Administration Tools for Windows.
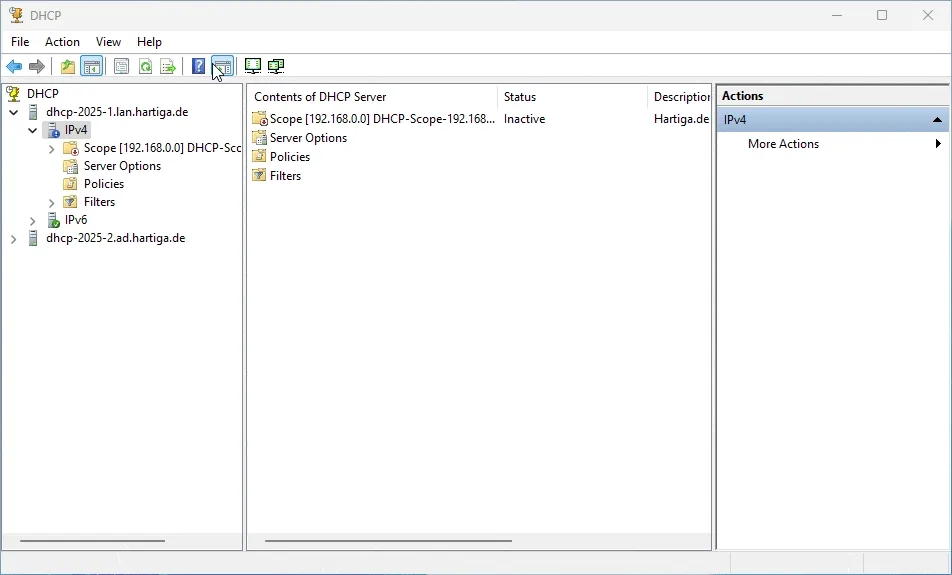
Configure Initial Scope
Configure 50:50 Load Balancing
This is the example and you can configure hot stand by if needed, but I highly recommend to stick with load balance for most your scenarios and make sure your DHCP servers stay in sync.
Subnet Calculation for Double Capacity
To accommodate failover, size your scope for twice the device count. For example, 350 devices → 700 addresses.
| Prefix | Usable Hosts | Subnet Mask |
| /24 | 254 | 255.255.255.0 |
| /23 | 510 | 255.255.254.0 |
| /22 | 1022 | 255.255.252.0 |
| /21 | 2046 | 255.255.248.0 |
Configure DHCP options
You need to configure a minimum set of DHCP options to fit your demands. Normally the minimum required are 003 Router, 006 DNS Server, 015 DNS Domain Name.
These options are essential for enabling devices to communicate with external networks and resolve DNS queries. They are crucial for the initial configuration of devices and are often the first options provided by DHCP servers.
003 Router should be your default gateway, which would be 192.168.0.1 for me (my Unifi Gateway).
006 DNS Server are my two domain controllers as they forward any information to my technitium DNS servers if needed.
015 DNS Domain Name is the domain I use for my Active Directory domain ad.hartiga.de and if you use something like .local, please ready my guide on choosing the right DNS suffix here.
Example for using Powershell
You can also use the following script and be sure to change the values in “value” and ScopeID when you run it on your DHCP server.
# Create a Load Balancing DHCP Scope
Add-DhcpServerv4Failover `
  -Name "Hartiga - DHCP - Failover_WS2025" `
  -PartnerServer "SECONDARY-DHCP-SERVER" `
  -ScopeId 192.168.0.0 `
  -SharedSecret "SecretPassword123" `
  -Mode LoadBalance `
  -MaxClientLeadTime 01:00:00

# Force an initial scope sync
Sync-DhcpServerv4Scope `
  -Server "PRIMARY-DHCP-SERVER" `
  -PartnerServer "SECONDARY-DHCP-SERVER" `
  -ScopeId 192.168.0.0
After running both commands:
Verify the failover relationship exists:
Get-DhcpServerv4Failover -Name "Hartiga - DHCP - Failover_WS2025"Check scope statistics to see lease counts on each server:
Get-DhcpServerv4ScopeStatistics -ComputerName "PRIMARY-DHCP-SERVER"Monitor event logs on both servers under Applications and Services Logs → Microsoft → Windows → DHCP-Server for any replication errors.
DHCP Settings for UniFi / Ubiquiti Equipment
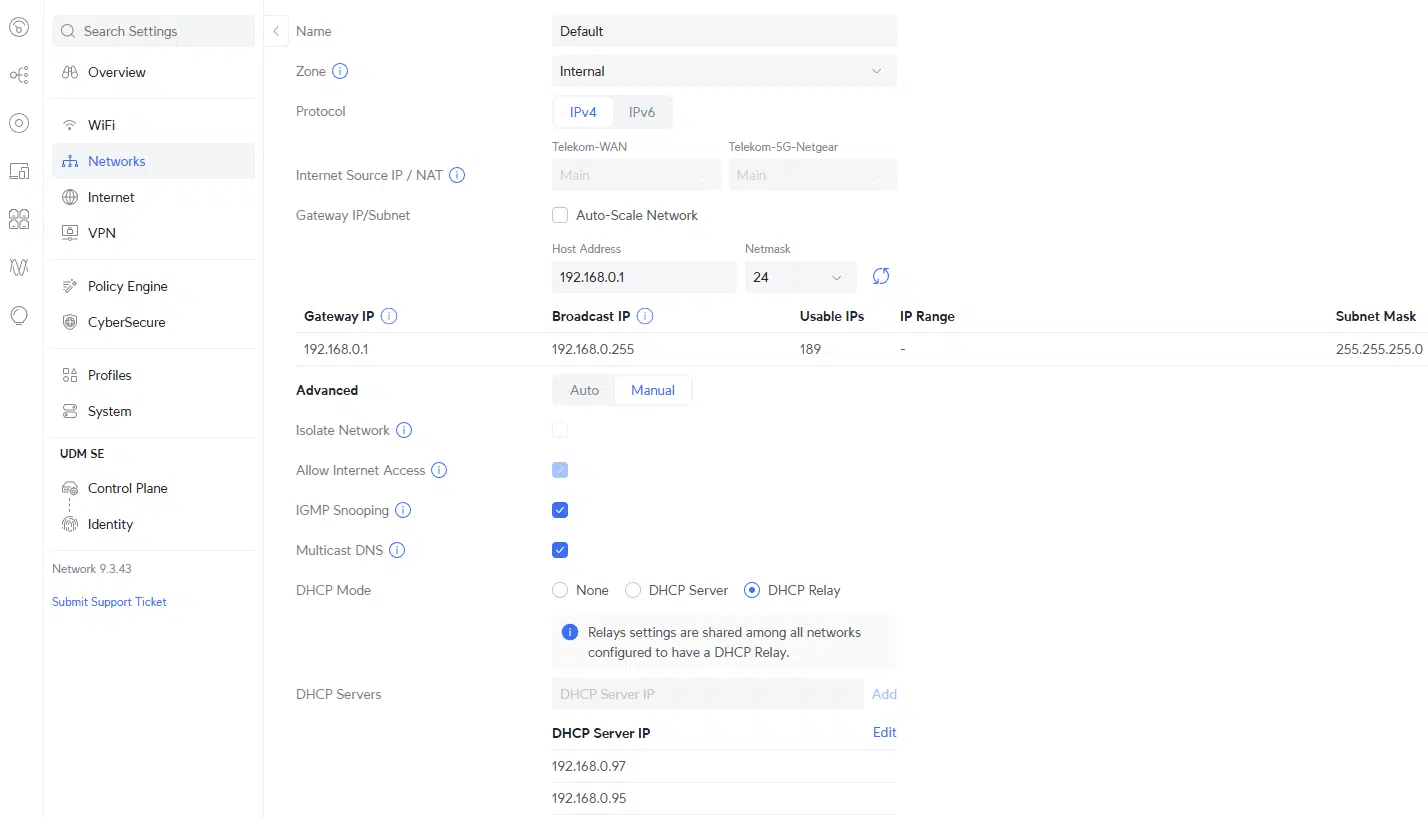
UniFi gateways can be configured as DHCP servers or relays, keeping Windows DHCP failover transparent.
- In UniFi Controller, go to Settings → Networks.
- Select network → DHCP Mode:
- Server for UniFi-provided leases.
- Relay to forward to Windows DHCP.
- Define address pool if in Server mode.
- Optionally disable Ping Conflict Detection to reduce lease latency.
Check the Unifi recommendations and configurations guide here.
References:
https://datatracker.ietf.org/doc/html/draft-ietf-dhc-failover-12
Microsoft DHCP Failover Overview
Windows Server 2012 – Configuring DHCP Failover – This really needs an Update
Deploy DHCP Server using Powershell
Conclusion
I’d love to hear if this has helped you and what information you needed to research to add that information to this article.
Message me via LinkedIn, Mastodon, Bluesky or join the Adaptive Cloud Community on Reddit.
To find even more linkls check my website here.